Glimmer Mist Frosty
Glimmer Glass Album
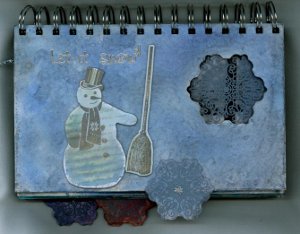
Below is my version of the Glimmer Mist Frosty Glimmer Glass Album by Tattered Angels.
I planned my Album to show one photo per page before decorating the Ivory Pages pages with
Glimmer Mist. This cute little album measures about 5 1/2" x 7 3/4" with a cut out Snowflake in the cover and three tabs in the shape of Snowflakes, and a metal spine.
Album Tip: Prior to Glimmer Misting the pages of the Glimmer Mist Frosty Album, I chose to take the 24 pages off from the spine which made it much easier to decorate each set of pages. Be sure to make a mental note of the page placement first. I used several techniques with the Glimmer Mist. Some of the pages were dried using a heat gun, some were allowed to dry naturally and on others I used different techniques. Go to the bottom of the page to see a few pages without photos for a full view of what can be done with Gimmer Mist on the
Glimmer Mist Frosty Album.
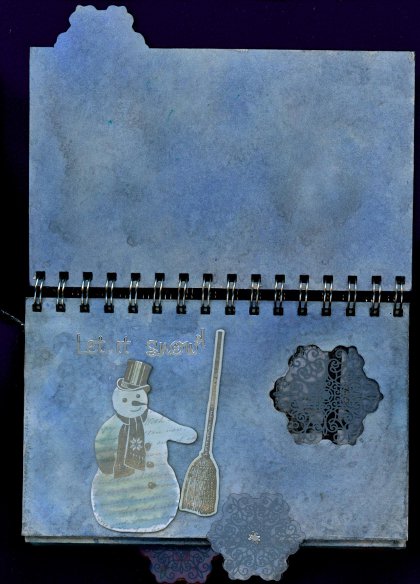
Glimmer Technique: For the back and front covers, I misted each with a light blue and dried with the heat gun. Then I re-misted, heavily, with the Silver. Just before using the heat gun for the second layer, I used a crumpled piece of plastic wrap and dabbed the Silver onto the paper which made the mottled look of snow clouds. Tip: Watch out as the plastic wrap will melt very quickly with the heat gun and stick to your fingers! Ouch!
Embellishments for the cover of the Glimmer Mist Frosty Album include Glimmer Chips Snowman and a Broom for him to hold that have been lightly misted with light blue. Since Glimmer Chips have adhesive on the back they stick very nicely.
Above the Snowman is "Let it Snow" in Silver Dazzles that I purchased at Paper wishes. The Snowflake shape cut into the album cover and Glimmer Glass Snowflakes are behind the cut out and also cover the shaped tabs. Silver Dazzels Snowflakes decorate each tab as well.
______________________________________________________
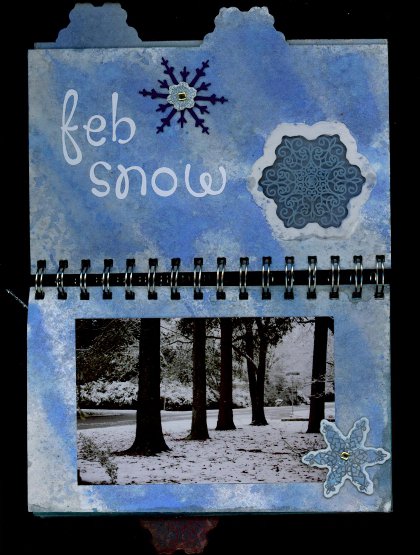
I have decided to go lightly on the embellishments as the paper was so pretty with the Glimmer Mist and the photos are really the focal in this little album.
For the inside cover of the Glimmer Mist Frosty Album with the Snowflake cutout, I just decided to use to say "Feb Snow" using the Loopy Love Cardstock Stickers by Doodlebug Designs, Inc. and added a dark blue Snowflake, a small Glimmer Chip Snowflake on top of that, all held together with a Silver Brad.
On the bottom page, only the large Glimmer Chip Snowflake with another Silver Brad.
______________________________________________________
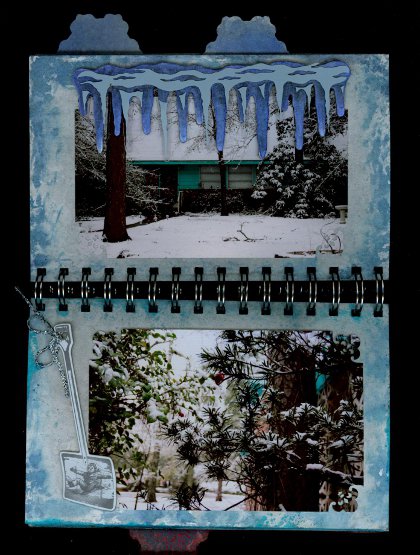
On the next page, I used a Glimmer Chip of Icecicles misted in dark blue with a Glimmer Glass on top. These were glued just to top of the photo and fit the 6 inch photo perfectly.
The tree photo on the bottom got a Glimmer Chip Show Shovel with Silver Cording through the handle adhered to the side of the photo, covering up an ugly spot in the photo.
______________________________________________________
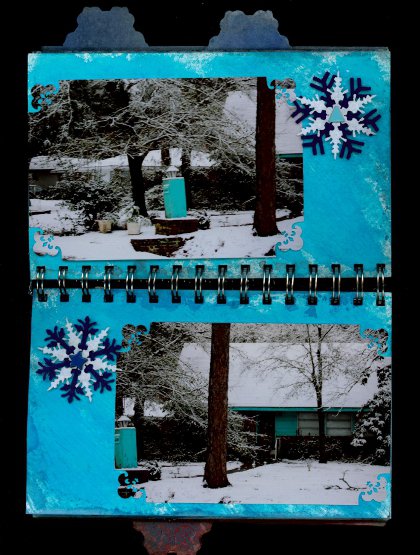
For these next 2 pages, I took a cue from the colors of the photos. With the snow and trees, everything was dark a silver with the exception of the Turquoise paint on the house and lamp post, so I misted the paper in Teal and Silver.
Glimmer Tecnhique: The entire page was sprayed with Pearl Glimmer and the edge was dabbed with a Turquoise to make a sort of Frame.
The only embellishments were the dark blue and white felt Snowflakes stacked and adhered with blue brads.
______________________________________________________
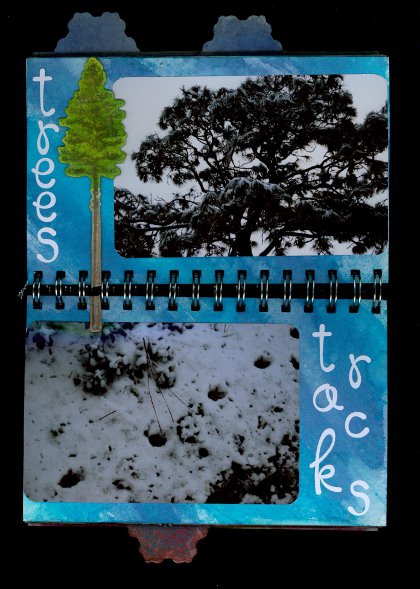
For these photos of the tall pine trees and some sort of animal tracks, I used the same lettering from the inside cover to spell out "Trees" and "Tracks" with the Loopy Love Cardstock Stickers by Doodlebug Designs, Inc. The tracks were surprising because the property is in the city and the tracks looked like deer tracks when I first saw them.
The only other embellishment is the Pine Tree Glimmer Chip that was misted on the top in Greens and on the bottom in Brown. Since it was too long to fit on the one page of the Glimmer Mist Frosty Album so I cut the bottom off and added the bottom portion to the page below.
______________________________________________________
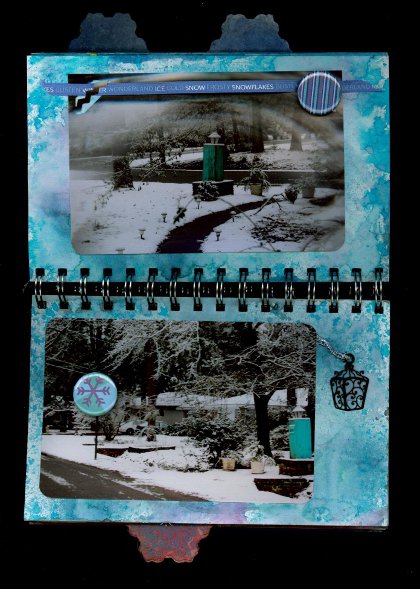
The top photo was taken through a stained glass beveled window which gave it the look of a "Fish Eye Lens". The Blue ribbon from Paper Wishes Personal Shopper says "Winter Wonderland, Ice Cold Snow" and is used across the top of the photo.
Glimmer Tecnhique: Sprayed Turquoise Glimmer Mist in a few small areas, then sprayed with Pearl all over. I allowed the two colors to mix, then dried with a heat gun.
The embellishments are two Winter themed buttons from my stash from the old Magic Scraps kits, now Advantus Corporation. The one on the bottom photo actually covers up the speed limit sign which I thought ruined the photo - so I covered it up.
Off to the right is Glimmer Glass Lantern, attached with Silver cording. Appropriate since both the photos showed the lamp post.
______________________________________________________
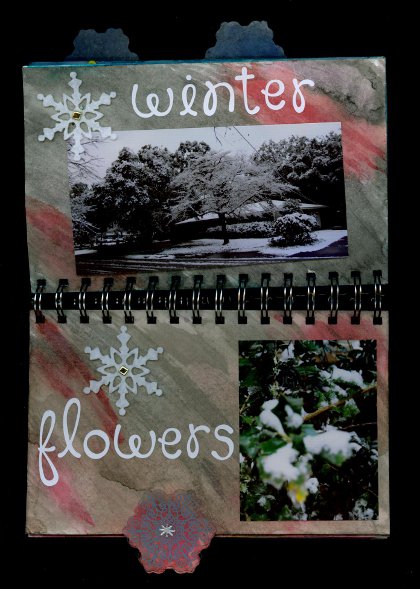
A change of colors for the Glimmer Mist Frosty Album. The album covers and one center page are heavy - all three with the Snowflake Tabs. I wanted the colors of the tabs to be different colors when the album was closed.
For these next pages, which were going to show the flowers in bloom at the time of the snow, I changed background colors to add Silver and Pinks. Glimmer Tecnhique: These pages were sprayed with one color, then wiped with a white paper towel. The second color was sprayed over blank spaces and wiped in the same direction as the first color until the page was covered. Tip: Spray the lighter color of Glimmer Mist first. Use more of that color as it will be covered over with the additional sprays on top.
Again, the journaling is done with the Loopy Love White Cardstock Stickers by Doodlebug Designs, Inc. and the embellishments are the White Snowflakes with Gold Brads.
________________________________________________
________________________________________________
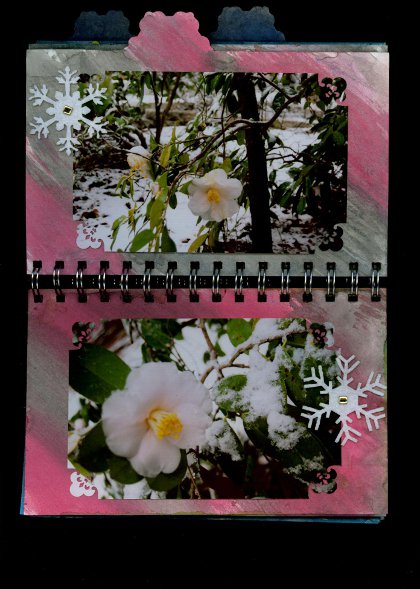
More flowers, this time White Camillas, and the background out of Golds and Pinks. Glimmer Tecnhique:These pages were sprayed with the Pink color moving at an angle on the paper. The Lime Green color was sprayed heavily over blank spaces and the two colors were allowed to mix and dry naturally. Tip: Spray the lighter color of Glimmer Mist first. Use more of that color as it will be covered over with the additional sprays on top.
Embellishments of White Felt Snowflakes with Gold Brads.
______________________________________________________
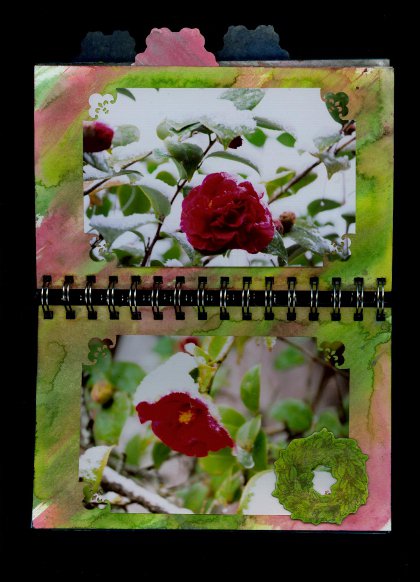
Glimmer Technique: This time the background out of Golds, Dark Pinks and a Lime Green to match the leaves behind the Red Camillas. Each color was sprayed in a sweeping motion across the pages, the first color wiped with a paper towel and the second color sprayed heavily and allowed to pool and dry naturally.
The only embellishment is a Glimmer Chip Wreath heavily misted multiple times in the Greens and adhered to the right side of the photo.
______________________________________________________
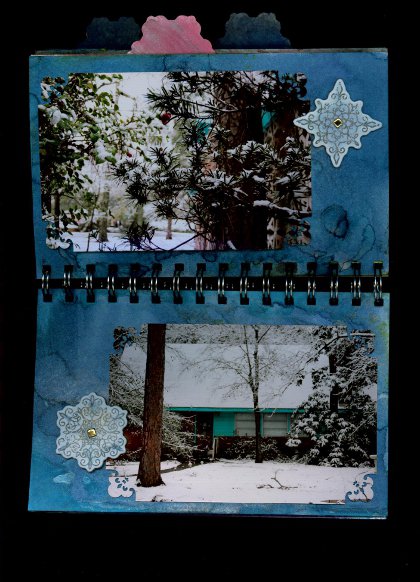
Back again with a darker Turquoise back ground and Glimmer Chip Snowflakes in two shapes adhered with Gold Brads.
______________________________________________________
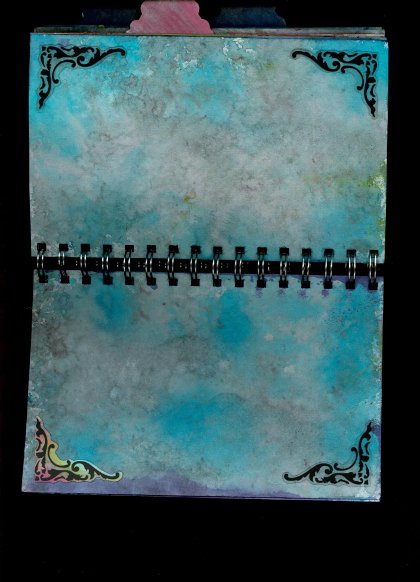
These two pages with no photos are meant to show the Glimmer Mist Frosty Album page designs. Glimmer Technique: This time the Teal Blue and Silver were sprayed onto the Plastic Wrap and patted onto the pages, each color separately. Then, dried with a heat gun.
Framing the outer edges are 4 Glimmer Glass Corner pieces.
______________________________________________________
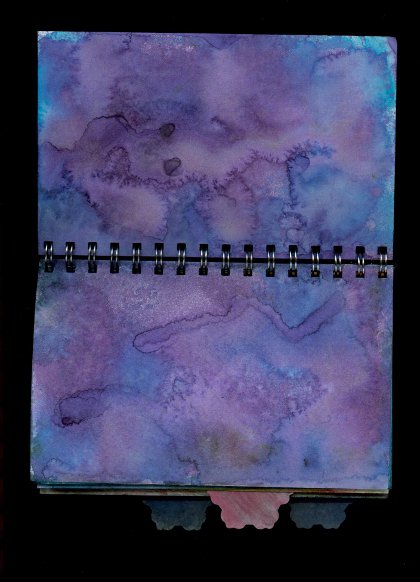
Glimmer Technique: This Glimmer Mist in Purples, Blues and Turquoise were heavily sprayed one after another without allowing drying time. These colors pooled into some locations and were allowed to dry naturally.
______________________________________________________
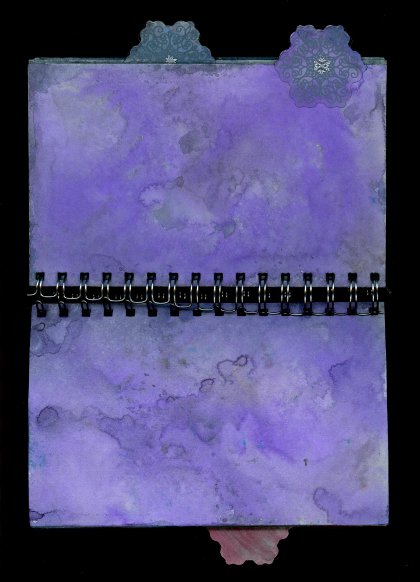
Glimmer Technique: This Glimmer Mist in Purple and Silvers, was put on two ways. The Purple Background was patted with the plastic wrap and dried with a heat gun. Later the Silver was heavily sprayed on and when it pooled on the paper it picked up some of the purple dye from the first misting.
______________________________________________________Final Tip: After your Glimmer Mist backgrounds are thoroughly dry, they may be a little wrinkled or warped as the Glimmer Mist is a water based product. Before reassembling the Glimmer Mist Frosty Album, I ironed my pages (no steam) with a warm iron and they came out just as flat and smooth as the originals. It makes for a much nicer booklet - a little more professional. I decorated them after putting them back in the spine.
Get one of these great Glimmer Mist Frosty albums a try or one of the other Albums. With a few colors of Glimmer Mist you can make something really wonderful and learn lots of techniques for your Scrapbooking pages.
Check out some Scrapbook Pages &
the Glimmer Glass Garden Journal on this page.
Check out the Glimmer Mist Tutorial, Glimmer Chips & Glass,
Special Edition Products
Check out the Glimmer Mist Store
Go Back Home to Scrapbook Advice from Glimmer Mist Frosty Album.


