Scrapbooking Chalk
Scrapbooking Chalk can add some interesting, subtle and artistic effects to your scrapbook pages. Here are a few of the layouts where I have used chalks to do that.
Following those layouts are
the Scrapbook Chalk Tutorials.
After the tutorials, are photos showing types of
Scrapbooking Chalks sets available and the various colors in each set.
Finally are
tips and suggestions about how to achieve the results you want.
At the bottom of the page is our
Chalk Store where you can purchase the products shown on this page and even more types of chalking items.
Masking Technique
Scrapbook Chalk Tutorial

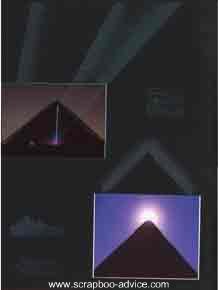
These Egyptian Scrapbook Layouts are very special to me. The pyramids at night were lite up with neon or strobe lights. I put the photos, with no mattes, directly on the black background and used my neon chalks to highlight the streaming light effects onto the background paper.
To do this I used a Scrapbooking Chalk "Masking" Technique.
1. I placed a small piece of paper (Post it Note, in this case) on the surface of the paper at the same angle that I wanted the "light" to continue off the photo and onto the page.
2. I then rubbed my little finger tip in the chalk and dragged my finger to apply the chalk from the masking paper off onto the background paper. This took several applications to get the light chalk to show on the black background.
3. When the masking paper was removed, the area where the paper was provided the straight line and the rest was "feathered" out from there.
______________________________________________
Stenciling Technique
Scrapbook Chalk Tutorial
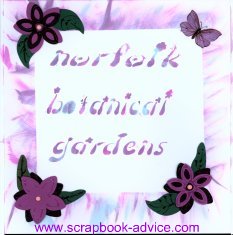
This title page for the Norfolk Botanical Gardens used a combination of Scrapbooking Chalk techniques.
1. The Title was first "stenciled" using chalks of purples, teals and blues applied with a small cotton ball on the end of an tweezer-like applicator.
2. Then, I placed a piece of scratch paper that was 8 x 8 inches over the title. That was the "mask".
3. Then I used the chalks again in what is called "direct to paper" in 3 colors, and dragged the chalks themselves across the mask paper onto the background paper and blended with my fingers.
4. Once the mask was removed it revealed a frame, of sorts, in the shape of the mask.
______________________________________________
Direct to Paper Technique
Scrapbook Chalk Tutorial
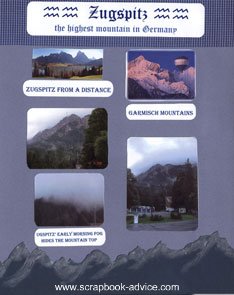
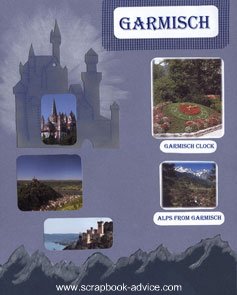
For these Germany Scrapbook Layouts I tried to convey the image of the height of the mountain and the early morning fog and gray sky so my background papers were just plain gray.
For all the chalking, I used a "Direct to Paper" Technique.
I found the mountain top die cuts at my local scrapbook store years ago in a gray that was several shades darker than my background paper. I used those for the bottom border of the pages but used white and light blue chalk on the peaks to depict the snow.
I also found a castle die cut and chalked some of the structural lines a darker blue and then used a white chalk to emphasize the background lighting behind the castle. The chalking accents are subtle, but make a big statement.
______________________________________________
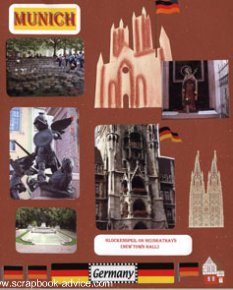
For this Scrapbooking Chalk accent, I used another castle die cut accented with rust colored chalk. The Castle die cut was difficult to see the many lines in the die cut, but the chalk applied with a tiny round cotton ball brought out the nice accents of the die cut and gave it a little more dimension.
______________________________________________
Background Technique
Scrapbook Chalk Tutorial
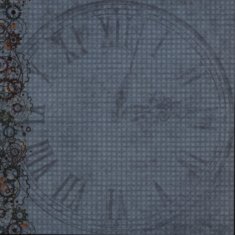
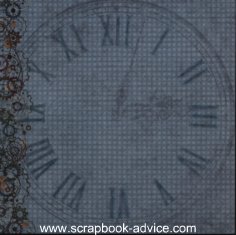
Here on the left is a sheet of background paper that I received from the January Personal Shopper Kit from Paper Wishes. While I love this paper, I wanted to use this for a Birthday Page with some other embellishments that were Aqua. The paper had a little more Blue than I wanted and I also wanted to enhance the numbers on the clock face to make sure they could be seen once I put the photos on.
So I used some Scrapbooking Chalk called Metallic Cream Chalks in a mix of Blue and Green, and the little alligator clip tool and cotton bud to enhance the numbers on the clock face.
Scrapbook Advice Tip: The nice thing about using the Chalk instead of ink - the Chalk can actually be erased if you get a little too much on or if you find you don't like it at all.
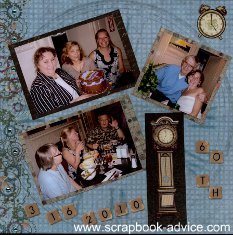
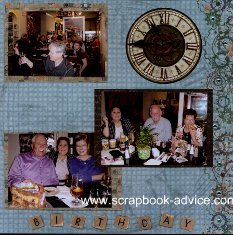
Here are those finished pages with some photos and embellishments added. The one that is enhanced with the chalk is now on the left and really shows up so much more than the one that is not enhanced.
Everything on these layouts was from the Personal Shopper Kit for January 2011 - the paper, the lettering, the aqua nail heads added to the border image and the layered clock embellishments from a sheet called Rustic Clocks 3-D Papier Tole Die Cuts. I must say they are awesome and fun to put together with pop dots.
The letters that look like scrabble tiles, were on a printed sheet. I cut them out with scissors, a put a coat of Clear Ranger Glossy Accents and attached them to the layout after they dried for several hours.
______________________________________________
Stenciling Technique
Scrapbook Chalk Tutorial
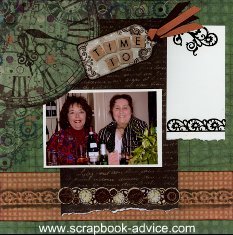
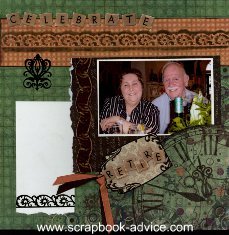
These two Scrapbooking Chalk layouts have used a Brown Metallic Cream Chalk (shown below) and a Dazzles strip to accent the orange border. The Dazzles was laid down on the paper and the Chalk was applied to the paper using the Dazzles strip like a stencil. Since the Dazzle was only 6 inches long, it was then removed and placed down again to continue with chalking the border. After that, the actual Dazzle was used on the bottom of the journaling card.
Most items from these layouts were from the Personal Shopper Kit for January 2011 - the paper, the lettering, the Black Dazzles, the Tags and the strip of layered clock embellishments from their Rustic Clocks 3-D Papier Tole Die Cuts that a very interesting dimension to the border.
The Ivory Card Stock for Journaling blocks and brown and orange ribbon on the tags was from my stash.


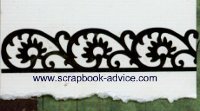
Above are close ups of the Chalk with Dazzles as stencils and a short piece of the Dazzles strip.
______________________________________________
So How Do You Get Your Scrapbooking Chalk?
First you need to make sure that you get chalk that
is meant for Scrapbooking, to make sure that it is
"acid free." The images below are some of the Scrapbooking Chalks that are currently available.
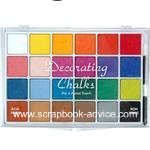
This was my first purchase of Scrapbooking Chalks by Decorating Chalk. These are available to purchase on Page 1 of the Scrapbooking Chalk Store at the bottom of the page.
This set has 24 of the basic colors of White, yellow, yellow/orange, orange, red/orange, red, flesh, pink, magenta, orchid, violet, dark blue, royal blue, light blue, turquoise, dark green, green, lime green, burnt sienna, tan, light brown, dark brown, grey and black.
This set runs about $14.00.
______________________________________________
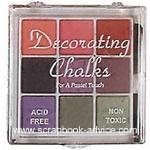
This Set #2 on the left, has 9 colors and also comes with 2 applicators. The colors are Coral, Rose, Cranberry, Eggplant, Plum, Burgundy, Lavender, Moss, and Sage.
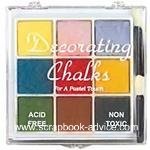
This Set #3 on the right, has 9 more colors. They are Pale Yellow, Light Mauve, Wedgewood, Blue-Green, Brick, Butterscotch, Forest Green, Brown, and Charcoal.
The price for each runs about $5.00
______________________________________________
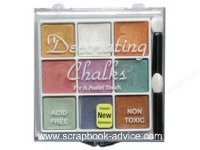
This is the 9 pc Glimmer Chalk Set - which will provide sparkle or glimmer, depending on the color, type of paper and reflective lighting.
Colors include Gold, White Sparkle, Blush, Rosie Gold, Lilac, Emerald, Sparkle Green, Blue Sparkle and Golden Copper. This set also comes with 2 little sponge applicators and runs about $6.00.
______________________________________________
Another brand of
Pearlescent Chalks and Metallic Cream Chalks is made by
Pebbles called I Kan dee. These kits are available to purchase below on page 2 of the Chalk Store.
These are only two of many sets of shades that come in a tin with
30 colors of Chalk, an Aligator clip tool and 3 sizes of mini cotton balls to use for applicators. The nice little tin boxs clearly show all the colors, and keeps all the little pieces in place.
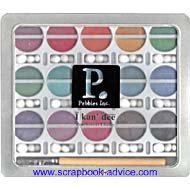
The Pearlesent Chalks are pastel colors are very soft and add an nice sheen to anyplace you apply them to.
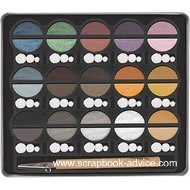
The Metallic Cream Chalks are darker Metallic Colors and polish up to a high sheen.
______________________________________________
ColorBox Fluid Chalk inkpads are really great for achieving the
soft, subtle look of chalk with your artwork. ColorBox Fluid Chalk inkpads come in five sizes or formats: mini, full size and Cat’s Eye ink pads, plus Paintbox and Petal Point Option Pads. These inkpads all have re-inkers available. And each of the
five types of pads and re-inkers come in a full assortmemt of 38 colors.
Alabaster, Amber Clay, Aquamarine, Azurite, Bisque, Blue Iris
Blue Lagoon, Blush Rose, Burnt Sienna, Charcoal, Chestnut Roan, Creamy Brown, Dark Brown, Dark Moss, Dark Peony, Deep Green, French Blue, Ice Blue, Ice Jade, Lavender, Lime Pastel, Lipstick Red, Maroon, Olive Pastel, Orchid Pastel, Peach Pastel, Pink Pastel, Prussian Blue, Rose Coral, Rouge, Tangerine, Warm Green, Warm Red, Warm Violet, Wisteria, Yellow Cadmium, Yellow Citrus, and Yellow Ochre.
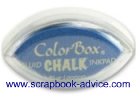
The Cat's Eye (shape) Ink Pad of Fluid Chalk is the smallest
These Cat's Eye pads can be used in the Direct-to-Paper method by just dragging the pad across your paper. I do this a lot to decorate the edges of my photo mattes and to give them depth.
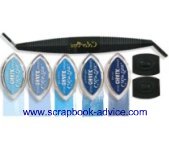 They now come in 6 different sets of Six Fluid Chalk Cats Eye Pads called Queue and feature a Stylus handle with two adapter tips. These are great sets for shading since all the colors are in the same family.
The Stylus tips can be used to transfer the ink from the pads to the paper or the Stylus can actually be attached directly to the back of the Pad. For many, the Stylus provides more control over the ink as it is held like a pencil.
Check out our Scrapbooking Chalk Store at the bottom of the page to see all of the wonderful colors available in Fluid Chalk Pages. These are available for purchase on starting on page 4 of the Chalk Store.
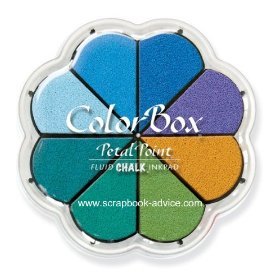
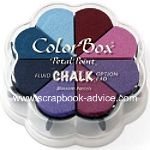
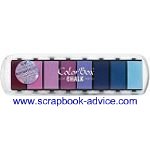
These are other forms for the Fluid Scrapbooking Chalk Pads - The Petal Point and Paint Box Sets. The rounded outside edge is great for inking larger areas while the point of the tip is great for getting in close to those smaller areas.
These Petal Point sets are each 8 colors and each pad color is separate on an "Option Plate" that slides out and has a small tab on the bottom to use for a handle. The same Option Plates are in the Paint Box
While these sets they are stored together, the Optaion Plates allow them to separate easily to use and re-ink.
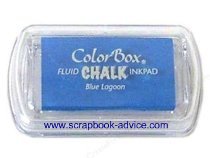

So check out our Scrapbooking Chalk Store at the bottom of the page for more on the Fluid Chalk Pads - they start on page 4.
______________________________________________
Another option for Scrapbooking Chalk is a collection of
Zig Memory Systems Writer Dual Tip Pens in the Chalk Collection. These come in the fine and bullet tip markers, and the final product resembles a
soft chalk pastel color once they are dry. They also are great for writing on dark and bright color paper.
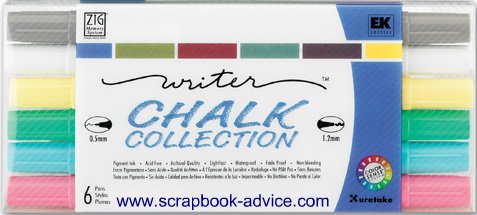
They come in a package of 6 colors with white, gray, pink, yellow, green and blue pigment ink. These are also acid free, archival quality, light fast, fade proof and waterproof as are all these wonderful scrapbooking pens and writing tools.
The price for the set runs about $25.00 and the can be purchased separately for about $3.00 each.
These are available on Page 3 of the Scrapbooking Chalk Store below.
______________________________________________
So How do you fix an error with your Chalk?
Scrapbook Chalk Tutorial
Most of the places that sell chalk sets will also sell the additional applicators and an eraser. I use a regular
"White Eraser" which will work fine erasing your chalk if you don't wait too long for it to set up. The manufacturer recommends a
"Chalk-Away Eraser." Careful, the eraser does not work on the Chalk pens or ink pads - only on the dry chalk.
Do you have to seal your Chalk?
Scrapbook Chalk Tutorial
The makers of Decorating Chalk recommend a
"Blair No-Odor Spray but they say that the fixative is not required, although it does help to protect the projects. I have
personally not used a fixative on my projects, but I did dust off or erase the excess and have stored them in page protectors.
What kind of Papers should you use for your Chalk projects?
Scrapbook Chalk Tutorial
I have used my chalks in many different types of scrapbook paper. The manufacturer says that the type of paper that is used may determine the intensity of the colors.
With a
softer paper, the chalk will work itself into the fiber of the paper and bring out
the full color of the chalk.
A
harder or glossy type paper will provide a
softer more pastel sheen.
What type of Applicators should you use for your Chalk projects?
Scrapbook Chalk Tutorial
The manufacturer recommends an
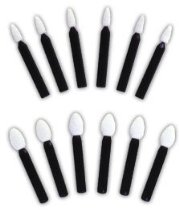
E-Z Chalk Sponge Applicators (which look like the little eye shadow applicators) that they call
Pixie (finer applicator) and
Pudgy (wider applicator).
I have a set of about 12. They are double sided and
I reserve a set for each of the major colors. I have red set, blue set, green set, brown set, etc. I keep them in a little plastic box along with my eraser so that all my Scrapbooking Chalk supplies are together.
These are available on Page 3 of the Chalk Store.
Q-tips can also be used for application, but first roll the end of the Q-tip around in your fingers to get the stray fibers up close to the tip to make give you more control with your applicator.
For larger areas that you wish to cover, or for more vivid color, you can use something like a make up sponge, or run the chalk piece directly across the paper, in what is called direct to paper. This method might require some shading with a tissue, cotton ball, or maybe just your fingertip.
______________________________________________
I hope the tips and information provided here will help you in your use of Scrapbooking Chalk.
Play around and be Creative!
Below is the Scrapbook Chalk Store.
Use the scroll bar at the bottom of the box to scroll to the right and see your Amazon Wish List; search for other products; or see product reviews.
When you purchase from this page, you are actually purchasing from Amazon.com. All orders go through Amazon's secure order server.
If you have any questions on Scrapbooking Pens, please Contact Us.
Go back to the Scrapbook Embellishments page.
Check out other Scrapbook Tutorials
Go back to Home Page for General Scrapbook advice
from Scrapbooking Chalk


 They now come in 6 different sets of Six Fluid Chalk Cats Eye Pads called Queue and feature a Stylus handle with two adapter tips. These are great sets for shading since all the colors are in the same family.


