Scrapbooking for Beginners
will walk you through the process, step-by-step
Step #7 - Test Fit Your Layout
Scrapbooking Basics
The Quick Start Guide of Scrapbooking for Beginners.
1. Gather Related Photos.
2. Determine the Predominate Color.
3. Determine Theme or Context.
4. Pick papers - Based on your colors, theme or content.
5. Collect your tools.
6.
Matte the Photos
-- if you want to.
7. Test Fit the Photos to the page size and adhere to the layouts.
8. Add
Scrapbook Embellishments
or other goodies -- if you have them or want them.
9. Add the Journaling or save it for later.
10. Get your scrapbooking photo album and load the pages in your album and show off all that you have learned from Scrapbooking for Beginners.
OK, here we are nearing the end. Before we finish our page, we need to
test fit the photos, embellishments, title or journaling blocks and any other goodies we may have collected along the way.
Before you actually adhere your photos and embellishments, you may want to check out our page on
Scrapbook Adhesives
Try not to make the Layout too busy.
Leave some
"white space", even if that white space is a color - your background paper. This will give the eye a chance to rest and
focus on the main point of your layout - the photos.Scrapbooking for Beginners Tip: I usually try to work with a 2-page layout set up, so I can usually switch the photos from one page to another to give a good fit.
Test Photos With & Without Mattes.
I like to test fit the photos on the pages
first without mattes. Then if I want to add mattes, can I do so and will there still be room to fit them on the page with the extra space required for the mattes?
Then look at the photos to see if any can be cropped allowing me to
add the mattes to give the photos a little border. Check out our page on
Photo Cropping
for a more extensive look at ways to crop your photos.
Take a look at your photos to make sure you don't have
2 that look too much alike. If you have 2 that are alike, use the better one or you may be able to place them in an
overlapping situation where there may be a blank spot on one photo that can be covered up by the corner of another photos.
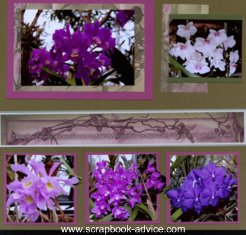
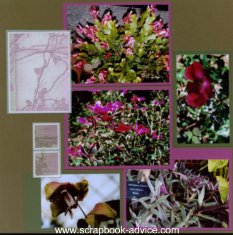
Test Fitting these layouts was a little different. These papers and layout designs were from Club Scrap® Bite-Size Collection Floral that I purchased from their website in October 2010. It was a beautiful collection, just enough 12" x 12", 8 1/2" x 11" papers and embellishments to make 6 great layouts.
One of the great things I love about Club Scrap, is that along with their kits they also provide layouts for those kits. They call those ALSB (Assembly Line Scrap Booking) layouts. This is what I used for the two layouts above.
Considering the fact that I had actually put the layouts together immediately after receiving them, they were sitting there waiting for some photos when I returned from the trip to Biltmore Estate. Scrapbooking for Beginners Tip: The layout on the Left had 3 small photo mattes at the bottom of the left page that were 3 1/2" square. My flower photos were just a little too big, so I cut them to 3 & 1/4" inches and cut around the flowers that were just a little too big to fit.
The layout on the right has three photos trimmed smaller to fit in the borders around the 2 main photos.
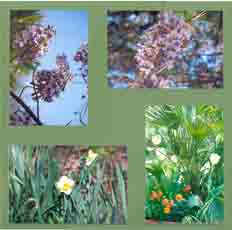
Scrapbooking for Beginners Tip: Don't forget, the mattes are not required. Sometimes the photos look just as nice placed directly on the background paper - particularly if the background paper is a solid color.

 ________________________________________________
Think About Your Title.
Think about your
title and think about
where you want to put it. Artistically it does not have to go at the top of the left hand page.
Scrapbooking for Beginners Tip: The Title can go anywhere. Up one side, on the bottom, in a corner, in the center, split between the two pages. Large, small, medium sized.
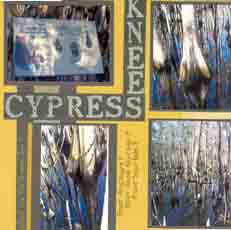
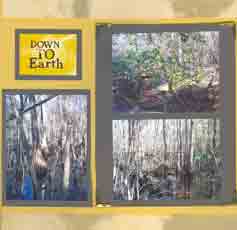
Titling is all up to you and whatever you have room for. The fewer the photos, the more extra "white space" and the more room for a title.
________________________________________________Any Other Journaling?
Do you want any other journaling. Don't forget the particulars of
who, when, when, where, and why! A Scrapbooking for Beginners basic. You can journal directly on the background paper, in the margins of your photo mattes, on separate pieces of paper or card stock that can be glued to the background page, attached with paper clips, staples, or ribbon. They can be tags, lettering squares, text cut from a brochure, or pictures of signs - like the layout on the left above. The sign explains all about what the Cypress Knees are for.
The list is limited only by your imagination.
Scrapbooking for Beginners Tip: While you are deciding where and how large to the title and journaling,
cut out some scrap paper (something that you may already be recycling) and use that for your journaling blocks.
Hand write on the scrap paper to get an idea of the size you want. Maybe a family get together or a party where the event is obvious and all family members. Maybe just the date will do and there is not need for much journaling - like the floral layouts above.
Move Things Around - Experiment.
Scrapbooking for Beginners Tip: Move things around, before you glue. Or, you can always use a repositionable adhesive until you finalize your layout. It is certainly easier to move things around in this environment than if you were trying to move furniture around in your home.
_________________________________________________Treat Your Embellishments Like Photos.
Don't forget to add your
embellishment items and just consider them like
additional photos. A large brochure or program may take up the space of 2 photos. A ticket stub from the theater will only take up a little room.

Keep moving things around, trimming and experimenting until you are happy with it.________________________________________________Need Another Page?
Have just a little too much for a 2-page Spread, but not quite enough to do another 2-page Spread.
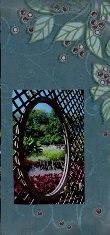
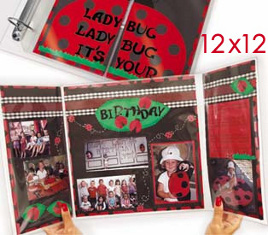
Scrapbooking for Beginners Tip: Try using a new type of page protector. Here below I used a new product I discovered at
Scrapbook.com called a Swinging Shutter (or Gatefold) Page Protector. I recently ordered a set of 3 of these and loved the idea of using this for some of the garden photos taken for my Biltmore Estate Scrapbook.
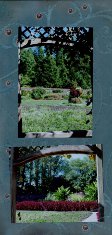
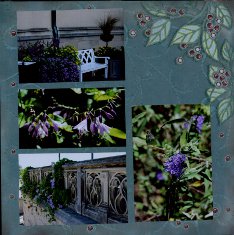
You can find these for your 12 x 12 pages and 8 & 1/2 x 11 inch pages also. Just click on the banner link below and search for Swinging Shutter or just Page Protectors to see more interesting page and photo protectors to use for your scrapbook layouts.
________________________________________________ ________________________________________________
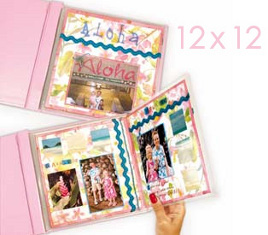
Also available are
Panoramic Fold-Out Page Protectors where an entire additional page folds out from a hinge on the outside of the page.
Scrapbooking for Beginners Tip: You can also make a mini scrapbook to put as part of the layout. You can make your own by joining photo mattes at the top or sides in a little book format to hold a number of photos. Or you can purchase some ready made ones that act like a mini page protector with a strip of adhesive along one side.
I have used these made by C-Line and I have found 2 more types in the page protector section at Scrapbook.com.
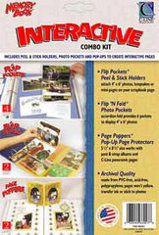
Scrapbooking for Beginners Tip: For adding just one additional photo, there is a product from C-Line called a Flip Pocket. This is a mini page protector, 4 x 6 inches, with an adhesive strip on the 6 inch side. This can actually be placed on the outside of the page protector with a photo on the front and can be lifted up to see the photo underneath. It holds a total of 2 photos, each 4 x 6 inches.
For adding 5 additional photos, there is a product from C-Line called Flip and Fold Photo Pockets. This is an accordion fold page protector, holding a total of 6 photos, with an adhesive strip on the 6 inch side. This can actually be placed on the outside of the page protector with a photo on the front and can be folded out to see a series of 3 photos on each side, each 4 x 6 inches.
Again, to purchase these click on the banner link above to Scrapbook.com and check out their link to Page Protectors on the left side of the page. The Flip Pocket and the Flip and Fold Photo Pockets will be available in an Interactive Combo Kit with 4 Flip Pockets, 2 Flip and Fold Pockets, and 2 Pop-Up Page Protectors.
_________________________________________________Need More Stuff?
When do we ever need more stuff? Well, occasionally there is just a
little too much white space on a page or a page just doesn't seem complete. It needs something. Can't think of anything else to add?
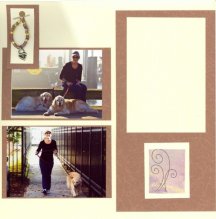
The page on the left needed something in the upper left, so I made a little beaded embellishment with a heart charm - a little like a fancy dog collar. I had planned to put another photo on this page, but didn't have one - so I put the blank photo matte on the page so the lady who got the album can add an additional photo or some journaling.
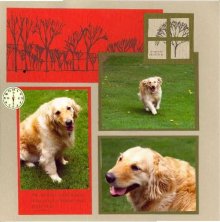
The page on the right needed a little something also, so I added the stamped image of a tree, cut into four equal pieces, matted them onto a solid piece of cardstock. It resembles the view looking out of a window to the outside.
Scrapbooking for Beginners Tip: Let the page sit a while and maybe something will come to you. You may remember something that you already have - remember from the Embellishments page - sewing notions, ribbons, fibers, a rubber stamp image. Did you forget anything that you were saving especially for this layout?
Scrapbooking for Beginners Tip: Ask someone else if they will take a look at your page. One nice thing about belonging to a crop group or an internet chat group is that I can share my layouts and ask for advice for improvement at the same time.
Run the page by someone else who was at the event. Can they remember anything about the event that possibly you have forgotten? Extend a journaling block, make your title larger, add a charm, rubber stamp an image to go with your theme.
Actually this is not just a beginners scrapbook advice tip, but always a good idea to get a review from another set of eyes.
Copy Someone Else's Layout
Scrapbookers actually do this all the time. It's called CASE - Copy And Steal Exactly.But trust me, it may start out that you like the layout and are trying to copy it, but
during the creative process, something always changes.
I can't even seem to copy my own layouts. I work at a College and every year I have the same idea about some pages for the Graduation Ceremony and every year the pages turn out completely different, but they always start from the same idea. It amazes me! But, I have learned to go with it.
But don't worry about CASEing - the photos will always be different.Also remember that
imitation is the finest form of flattery. If you really like a layout that someone has done, tell her you'd like to CASE it. That's a wonderful compliment.
Just take a look at the flower layouts above - the same and yet different. I do manage to take a lot of vertical photos so I can actually copy this particular design quite often.
Better yet, take a look at our page that discusses
Scrapbook Layout Sketches that have been compiled by the professionals at
Scrapbook Layout Sketches.
Next ... Move on to Step #8 -
Add Scrapbook Embellishments
The Complete 10-Step Quick Start Guide of scrapbooking for beginners
Our page on Scrapbook Layout Sketches
has ideas for easier ways to design layouts
Try out Scrapbook Photo Cropping for more creative ideas
Check out the scrapbook Adhesives to find the best one
Our Home Page for Scrapbook Advice from
Scrapbooking for Beginners


