|
Hand Made CardsQuick Start Guide to Card Making
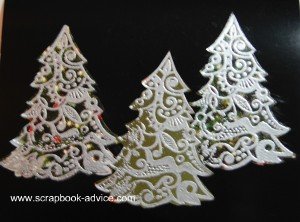
Quick Start Guide to Card MakingStep 1. Determine an Overall Greeting Card DesignMy Designs for Hand Made Cards, I must admit, usually come from a tutorial I have seen for a new technique or from an idea that I have seen someone else use. Usually when I make cards, I will pick a design or element, and make several cards along the same line, but each one is different. For instance, if I decide to use a certain line of stamps, say the Michael Strong Cloisonne Stamps, for my Christmas Cards, I will use all the Christmas images, like the Christmas Trees, the Ornaments, the Circle (for round Christmas Balls) and the Stars. Say I decide to stamp the images, emboss them, cut them out and color in the sections with markers, I will do a bunch at one time before assembling. When I assemble, I may use 3 trees, 2 stars, 1 small star and 1 small tree, or 1 large star or 1 large ornament. When finished, I have a group of cards that are done with the same technique, but each is individual. All my life I have heard that’s the beauty of handmade items - “no 2 are exactly alike.”
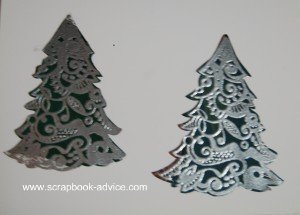
The embossed images were glued to Black Glossy Cardstock and White Glossy Cardstock respectively. Step 2. Get the Supplies You Will Need for Card Making* Card Stock and Paper * Paper Trimmer * Adhesive (wet and dry) * Scissors (small fine point) and/or craft knife * Embellishments * Envelopes (see below for link to purchase from Paper Source) I like to start my Hand Made Cards with White Card Stock and when I get into the creative mode, I purchase a package of white, light weight card stock (or any color) in 8 ½ x 11 inch size. These sheets can be cut in half to give you 2 sheets of 4 & 1/4 x 5 ½ inch size. Then folded in half (use a scorer for the best crease) for a perfect size for an A-2 card. No Leftovers! I also purchase my envelopes in packages of 10 at the craft store or office supply store, on-line at the Paper Source, or I make my own. Scrapbook-Advice Tip: If you want larger cards, you will have to make those calculations yourself, but check with the post office to make sure the cards you are planning to mail will meet their requirements. And don’t make too many layers for those cards that will be mailed as you don’t want to have to add additional postage and you sure don’t want the recipients to have to pay any postage due - ugh. There is also a new trend to make Hand Made Cards with multiple folds, gate-fold cards, tri-fold cards, z-fold cards, etc. Take a look at our card making page with multiple videos from other great paper crafters at Card Making Tutorials. Then I like to have a trimmer or paper cutter, strong adhesive, both wet and dry and printed or colored paper or cardstock, and other embellishments, like rubber stamps, inks or embossing powder or glitters, brads, ribbons or fibers. These other items will all be determined by the design on the front of your card. Scrapbook-Advice Tip: And my Scor-it if I really want those creases to look professional - specially if it’s heavy cardstock. Step 3. Card Front DesignThis is the most important and usually where my cards begin. Just like store bought cards, you need a Focal Point for the Hand Made Cards. Something that the eye will focus on when you first look at a card. The greeting, an image, a flower, a photo, a hole cut in the center of the card to frame what is on the inside, or maybe a card cut into a shape rather than just being square or rectangle shape. Something you only see in Hand Made Cards. If using a small image for your focal point, you may wish to use several small images that are related or physically connected as a focal point, but try to do these in odd numbers. Scrapbook Advice for cards Example 1: Things numbering 1, 3 or 5 just seem to look better than even numbers of things. Scrapbook Advice for cards Example 2: You decide to put a large Christmas Tree image on the front of your card. Put it a little off center and adhere securely with glue or adhesive all the way to the edge. When dry, cut around the tree branches cutting the front flap of the card as well. This will allow the inside of the card to show through. Or, cut both the front and back of the card in the shape of the tree. 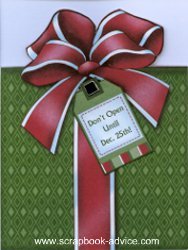
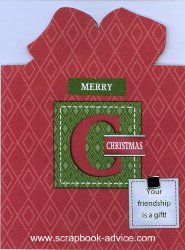
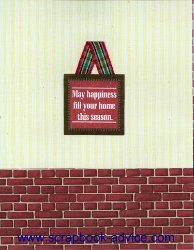
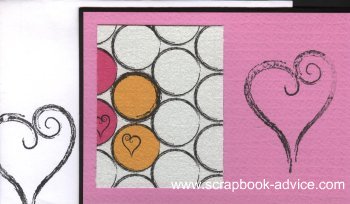
The inside of the card shown on the right was cut at the same time and carries over to the inside the same green print as the paper on the outside. Similar embellishments on the outside and inside are the tags both of which are attached with Square Silver Brads. Note: They were attached before the printed paper was adhered to the card itself so they don't show from the inside or the back. For the card fronts of Hand Made Cards, they can be a printed or embossed paper, metallic, or even fabric background that you have cut and glued to cover the entire outside of the card front. Scrapbook Advice for cards Tip: Cut the paper for the front a little larger that the front. Once glued down, you can turn the card over and use the edge of the card as a guide to cut the paper to size being careful, of course, not to cut the folded area. You can also line up the straight edge of the front paper with the folded edge of the card, then cut around the other edges to make sure you don’t accidentally cut the fold. Or, your card front can be a paper or card stock that fits onto the card front leaving a small border of the basic card all the way around like a frame. In this case cut your top cover first a little smaller than the card itself, and adhere with even spacing around it, like these below.
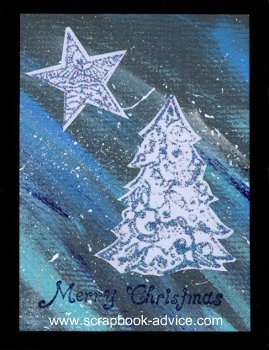
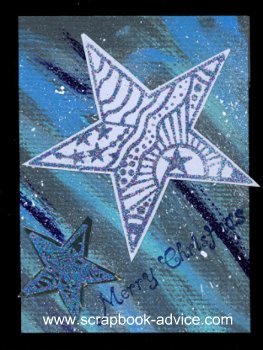
The background pieces are from a 12 x 12 sheet of cardstock that was hand pained and cut into various size pieces that yielded enough to make 10 completed cards when cut small enough to show a frame of the black card stock used underneath. Here is the Tutorial for the Hand Painted Background However you design the card front, it needs to be adhered all the way around the edges firmly. This is the part of the card that will be seen and handled the most and you don’t want it to come apart when someone is admiring your work. I would suggest a dry type of adhesive like 2 sided tape or a glue stick. A wet adhesive is likely to be absorbed into the cardstock and may cause warping or wrinkling of some sort. Make sure your Hand Made Cards have that really professional look. Step 4. Embellishments for Greeting CardsAdding embellishments to Hand Made Cards like brads, eyelets or ribbons, may take a bit of planning ahead. Add them to the front of your card before actually adhering it to the basic card so they won’t show from the inside. If you forget this, you can always cover the inside portion of the card with some of the same material that you used on the front. Here again, don’t make things too lumpy if you will be mailing them.
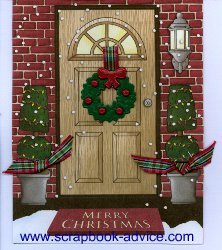
Red, white and green Ribbon was used to hang the wreath and make to knots to be attached to the picture of the plants on either side of the door. Step 4. Design the Inside of the Greeting CardOn your Hand Made Cards, remember to carry over some elements or scraps from the front of your card to the inside of the card. Use some of the covering from the outside of the card, possibly some of the same type or color of embellishments, the same font, or even continue the greeting from the front to the inside. Scrapbook Advice for cards Example: Merry Christmas on the outside and Happy New Year on the inside - Same Font. If covering the entire inside of the card with your pretty paper, don’t cover over the crease. Butte the straight edge of the inside paper to the inside crease so that when you fold it, the inside will not buckle. Scrapbook Advice for cards Tip: If the inside of your Hand Made Cards are a dark color, you may wish to add a lighter color inside to write your greeting on. Nothing worse than having a great card, but no white pen to write with. Have you noticed, they never seem to work past the first day.
Similar embellishments on the outside and inside are the tags both of which are attached with Square Silver Brads. Note: They were attached before the printed paper was adhered to the card itself so they don't show from the inside or the back. Step 5. And Last but Not Least - |
|
on our Site? More TutorialsAlcohol Ink Rubber & Acrylic
|
||
|
|
||


