Personal Shopper Scrapbook Layouts
Page 2
Below are a number of Personal Shopper Scrapbook Layouts from their 2011 Monthly Scrapbook Kits available from PaperWishes.com. Everything you need is included in the kits, including some directions for putting together a few pages and even some cards and tags and each month I learn a new technique or get to use a brand new product.
I often start out to follow their directions, but my photos are often different sizes so I alter their suggestions to match my photos. If I am doing the layouts for someone else, I always try to make them to accommodate 4 x 6 photos so the final owner of the layouts will not have to cut photos to fit.
I have found that using the Personal Shopper Scrapbook Layouts I
end up with layouts that have more embellishments than I normally use, but I think that keeps my books interesting and I like the different styles.Except for the background papers, there are enough extra papers left over from all these layouts to make coordinating layouts if you have more Photos.
Personal Shopper Scrapbook Layouts
December 2011
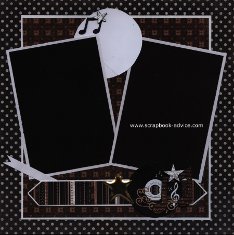
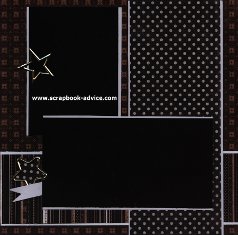
I just love any Scrapbook Layouts that have to do with music and there was enough paper and embellishments to make the December 2011 kit a real musical joy.
Aside from the 3 large Brad Buddy Stars, there was a full page of Magical Music 3-D Papier Tole which provided enough musical embellishments for at least 2, maybe 3, sets of 2-page layouts.
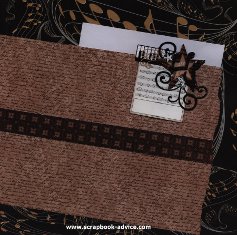
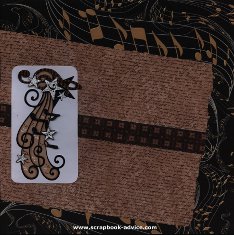
More of the Magical Music Papier Tole on these layouts as well, plus some great background paper with gold metallic musical notes. And, lots of other ribbons, chipboard butterflies, and 134 scrapbooking dazzles in a dark brown, not to mention the stunning papers for both masculine and feminine subjects.
More of the Magical Music Papier Tole on these layouts as well, plus some great background paper with gold metallic musical notes. And, lots of other ribbons, chipboard butterflies, and 134 scrapbooking dazzles in a dark brown, not to mention the stunning papers for both masculine and feminine subjects.
Personal Shopper Scrapbook Layouts
November 2011
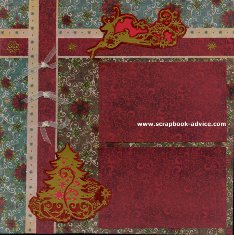
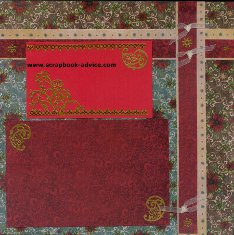
I just love the use of the Gold Christmas themed Scrapbook Dazzles on these Personal Shopper Scrapbook Layouts. All the Dazzles on these 2 are backed by a solid red cardstock which coordinates with the printed paper in the layouts.
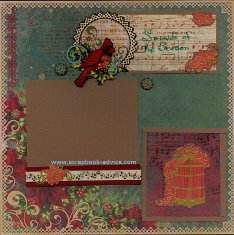
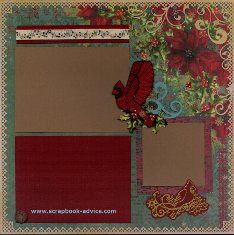
These beautiful Personal Shopper Layouts use a mixture of the Gold Christmas themed Dazzles and the Cardinal Papier Tole - 3 dimensional layered paper punch outs. Some of these are layered with as many as 5 layers and even look great under paper protectors.
Personal Shopper Scrapbook Layouts
August 2011
This August 2011 Personal Shopper Kit brought an assortment of Layout Ideas & themes, from Elegent, Masculine or Heritage, Back to School and Halloween.
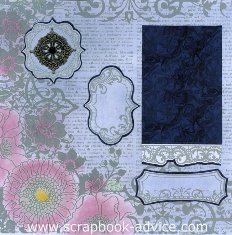
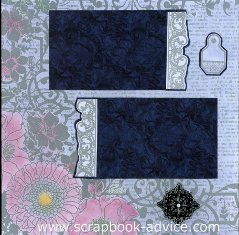
These first 2 Personal Shopper Scrapbook Layouts use a new "Color Me" Paper in Silver, called Flower Words. These background sheets came with the kit along with a 12 x 12 inch sheet of tags and borders, several of which are used here.
The Layout Ideas suggestion this month for using the "Color Me" Papers was to color with Chalk instead of Ink which was previously used. Two little chalks were included in Light Blue and Pink. I applied the chalk with a piece of paper towel twisted into a crayon shape, but there are a number of ways to apply the chalk - cotton ball, Q-Tip, Makeup Sponge, or Finger tip.
Scrapbook-Advice.com Tip: I also used a little Green Chalk for some of the flower centers and leaves and a little Yellow Chalk in the center of the larger flowers on the lower left side. Just added my own twist here and there.
The Tags were cut out by hand, and matted on a Blue Suede paper that was also used for the 3 photo mattes.
The other Embellishments were 2 Brad Buddies. The one on the left was mounted onto one of the tags. The one on the right was completely black, but it was sanded to show some of the beautiful filigree work in the silver metal under the paint.
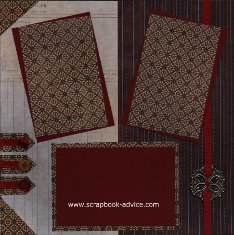
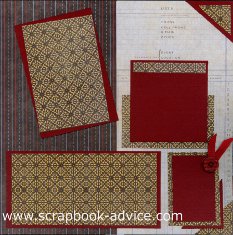
This next set of Personal Shopper Scrapbook Layouts from the September 2011 kit was for a Masculine layout, but I think I will use them for Heritage photos.
The background is two part, with a Brown with Red and White stripes, paired with a heritage style paper called Memory Ledger.
For the photo mattes, journaling boxes, corners and tags, I used a piece of Red Cardstock from my stash and the print of Ivory & Brown that came with the kit. The three portrait photo mattes were tilted as were their second mattes, but tilted at a slight different angel for interest.
The Red Ribbon and Buttons also came with the kit and I used these to accent and embellish the pages as well. The Red Ribbon on the left page was laced through a Silver Brad Buddy with Red Brad, and attached with tape to the back of the layout.
The Scrapbook Layout Ideas from Personal Shopper are a great place to start. I always seem to branch out on my own using their ideas, but then I always seem to branch out on my own even when using my own ideas.
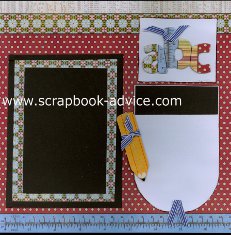
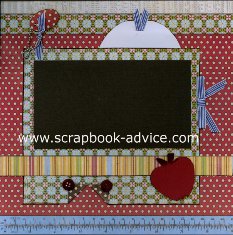
This next set of Personal Shopper Scrapbook Layouts focuses on the Back to School aspect. The Great background paper of Red with White Dots had the Blue Ruler Border on the bottom and two patterned borders on the Top. This really makes it easy to use the coordinated patterned papers to accent this pair of layouts.
The focal photo which will appear on the left page was triple matted in Dark Brown Cardstock from my stash, then matted with the same print in the top border, then matted again with the Dark Brown. A similar combination of patterned paper and Dark Brown Cardstock was used the right page as well.
The Embellishments were some chipboard pieces from Mya Road and were ABC, a Pencil Shape, an Apple Shape, an Oval Tag and a School Bus. I did not use the School Bus on this layout as I am saving a place for it elsewhere, but the other 4 pieces were covered with various papers, the edges were inked and used to accent the layouts.
The Journaling Blocks were rounded on either the top or bottom and accented with a fold of Blue & White Striped Ribbon stapled on.
The large print photo matte on the right side was accented with a piece of Brown with White Dots on the back, then cut and folded to reveal the underside as if the entire piece were double sided paper. The folded back pieces were fixed with red buttons.
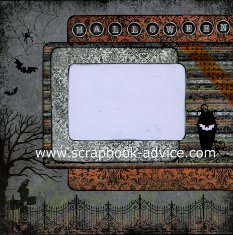
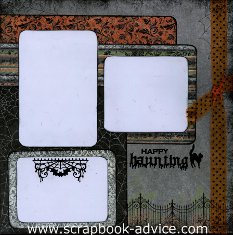
These last 2 Personal Shopper Scrapbook Layouts from the September 2011 Kit focus on Halloween.
The background paper has a great Cemetary themed paper and the oversized mattes of three patterned papers coordinate well. All the edges facing the outside of the layouts have rounded corners and all edges are inked in Black.
Black Halloween themed Dazzles are in various locations, one is used for a centered heading on the journaling block.
The Halloween Title is cut from a sheet of Typewriter Key Font that came with the kit and a piece of Orange and Black Dot ribbon was used to accent each side.
Personal Shopper Scrapbook Layouts
May 2011
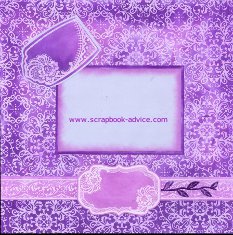
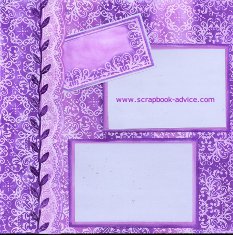
The May 2011 Personal Shopper Kit brought us Elegance and Fun all together in the same box.
These first two Personal Shopper Scrapbook Layouts use the Color Me Paper which was originally White with White Embossing. The embossing resists ink which was applied with two colored ink pads from Paper Craft in Lilac & Violet. See the
Ink Direct to Paper Tutorial
for how I colored this paper.
The Color Me Paper is the Medallions. Also included on the layouts are 2 border strips and 3 tags from the Tag Sheet of Color Me papers. The Leaf Ribbon used on both pages was originally White and Inked with the Lilac pad.
Each photo will be double matted, each one cut from white card stock and inked with the Lilac and Violet Pads.
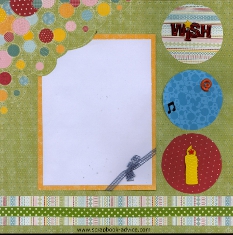
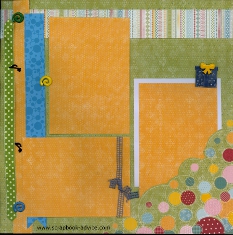
These 2 Personal Shopper Scrapbook Layouts above and below from the May 2001 Kit use patterned papers with coordinating designs in Circles and Dots. Mixing patterned papers on a single page has always been difficult for me, but I am getting the hang of it with the Personal Shopper kits. These layouts will be used for Birthday photos.
This kit uses Brad Buddies, with the "Wish", Birthday Candle, and Package, plus the green dotted ribbon and blue stretchy ribbon to accent 2 page mattes.
Corner Cutting Technique: On both of these Layouts I used a craft knife to cut the borders on the corners to slip the photo mattes under.
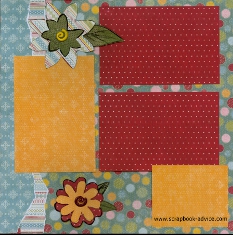
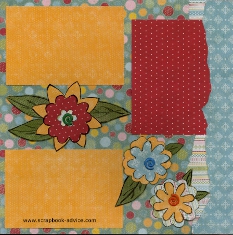
These next 2 layouts from the May 2011 Personal Shopper Kit use a template of flower patterns that also came with the kit. Again, these pages also use several of the printed patterned papers, already coordinated.
Paper Tearing Technique was used for each of the outside borders.
Flowers & Leaves were cut from the various papers, the edges were inked, and layered together with either 2 or 3 layers. All were attached with the Circular Brads that were also included in the kit.
Mattes & Journaling Boxes were cut from the same papers as the flowers.
Personal Shopper Scrapbook Layouts
April 2011
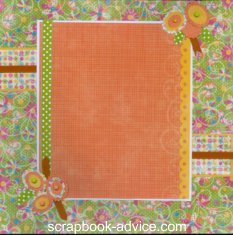
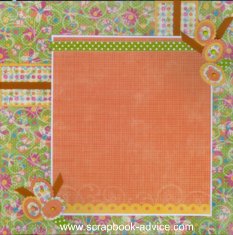
Mixing Patterned PapersMixing Patterned Papers has always been difficult for me, but with these great papers, coordinated in both designs and colors, along with the ribbon embellishments and suggested ideas, I find that mixing the patterns is very easy.
The
background is a green floral with pink and orange flowers, which vines and white dots all over the background. This goes great with the Orange Matte (with white grid lines) with the yellow scalloped design on the edge and the green ribbon with white dots.
Accents of another patterned paper matted on bright yellow, accented with orange ribbons, anchor the Orange Matte which is itself matted with a 1/8 inch white border.
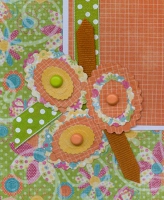
The Flowers are cut using my Spellbinders Scalloped Oval shapes in 3 sizes from the orange, and both floral patterns. Each flower is put together from 3 pieces attached with an orange brad. The suggestion from the Newsletter included with the kit suggested cutting them by hand, but I wanted to try out my new die cuts.
_______________________________________________
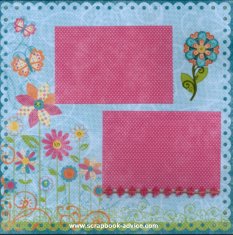
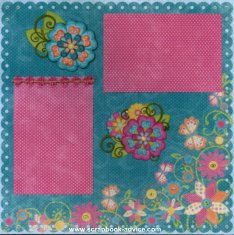
Aqua with Pink & Nostalgic Paper Tole FlowersThe
Background Papers on these layouts are a Light and Dark Aqua with scalloped edge design and floral patterns in Pink and Orange.They have been mixed with
Photo Mattes of Dark Pink with White Dots and large embellishments of
Nostalgic Paper Tole Flowers that match the colors on the background.
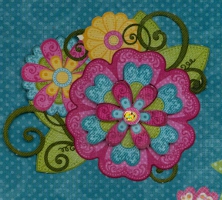
Nostalgic Floral Paper Tole Flowers came as one die-cut sheet with 4 designs. Each of the flowers are punched out and layered using foam tape in between each layer. They look great and appear to have taken a long time, but they were actually very quick to assemble.
Other Embellishments are a dark pink Rosette Ribbon placed on the side of 2 of the photo mattes and Holographic Dazzle Dots that I placed on the flower centers and three dots in the scalloped pattern on the corners.
________________________________________________
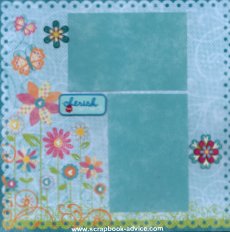
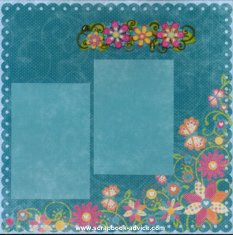
Aqua with Aqua & Nostalgic Paper Tole FlowersThese Personal Shopper Scrapbook Layouts are the same as the 2 above, same background paper snd embellishments. All I changed was the color of the mattes from the Pink to an Aqua.
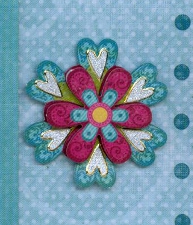
I used some Holographic Dazzle Hearts on these pages for the flower centers and to accent the petals of the Paper Tole Flowers as well. Another embellishment is an embroidered tag that says "Cherish the moments."
________________________________________________
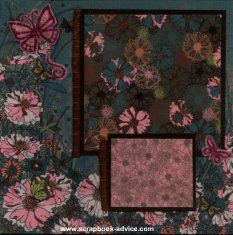
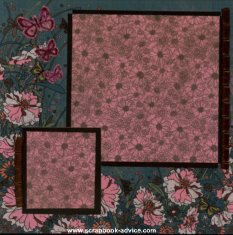
Pink and Brown Florals with Glitter ButterfliesThe Floral papers used in these Layout Ideas were most unusual and dark enough to be used for
masculine layouts even though they have flowers. There was a
nice set of 3 coordinated patterns, a Dark Green with Pink, Gray and Brown Flowers making a border, a paper with the same Florals all over and then a Pink paper with Brown Florals to match. Also in the kit was a dark brown solid that I used to matte each section of paper.
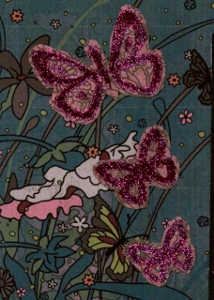
There is a Brown Satin Pleated Ribbon on the side of each section of paper. The other Embellishments were double-sided Butterfly Dazzels that have been backed with some of the pink paper and glittered in a Dark Raspberry Glitter. Both the Dazzles and Glitter came with the kit.
________________________________________________
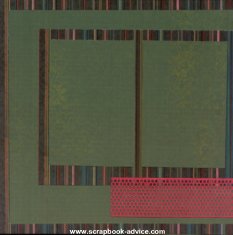
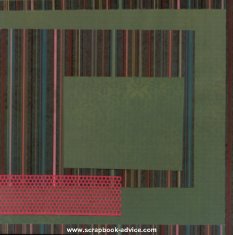
Stripes with Magic MeshVery simple Layout Idea here with the Plain Green mixed with Various Stripes in dark colors. This is another good layout to use for
Masculine photos.The only embellishments here are the
Pink Dotted Mesh used along the bottom of each section for photos. The Personal Shopper Scrapbook Layouts Newsletter suggested using the backing from the
Dotted Mesh to ink or chalk through. I liked the idea, but I had already planned to use the plain Green Border for Journaling.
________________________________________________
________________________________________________
Personal Shopper Scrapbook Layouts
March 2011
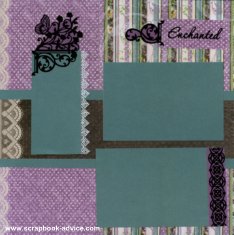
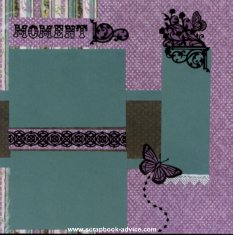
Enchanted MomentThese two Personal Shopper Scrapbook Layouts
mix more patterned papers. The background is Purple with White Dots and it is mixed with a
Striped paper that has one of the stripes of Purple with White Dots. The other colors in the Stripes are used in the mattes and border stripes.
Lace is used on the two Journaling Blocks to match the lace printed on the left side of the layout in 2 sizes.
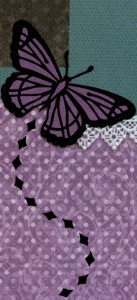
Lots of Dazzles are used on these layouts. From the Border Stripes, to the Corner Pieces used on the Journaling Blocks and the Title, the Title Words and The Butterfly with the flight path.
Scrapbook-Advice.com Tip: The Flight Path for the butterfly was made from the left over pieces of the Dazzles - the "innies" - after the sticker has been removed from the backing sheet. An easy way to get these off and properly positioned is to use the tip of a craft knife or a safety pin or needle and stab the piece and move it on the Craft Knife Tip to place it into position. Much easier and more control that trying to use your fingers or even a pair of tweezers.
________________________________________________
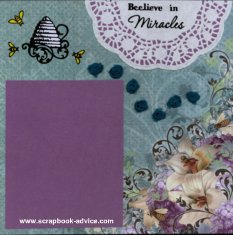
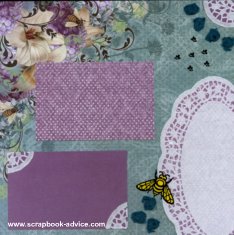
Bee-lieve in MiraclesBackground is a stunning floral on one corner with each page places so the
floral spray moves from the left to the right page.
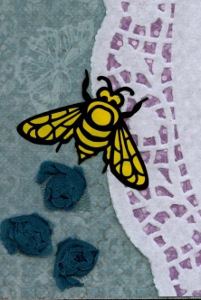
The Doilies are backed by a Solid Purple and pieces of the doilie were used on 2 corners of the photo matte.
The Dazzles used are the words "Beelieve in Miracles", a Bee Hive and an assortment of Bees on both sides in various sizes. Also accenting the pages are net flowers in teal that were cut apart from ribbon.
Scrapbook-Advice.com Tip: The Dazzle of the Bee was placed on a piece of yellow card stock and trimmed closely with fine tip scissors. The Dazzle can also be placed on white background and colored with Chalk, Inks or Copic Markers.
________________________________________________
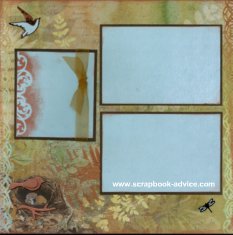
Birds in the NestI really liked these 2 Personal Shopper Scrapbook Layouts as I am a bird lover from way back. The paper on the left had a
picture of a birds nest with eggs inside. The kit came with a little tiny chipboard bird and a branch that they suggested I ink with copper ink and put on the picture. There are 2 more Bird Dazzles backed with the light blue of the photo mattes which are outlined in the copper ink and matted on dark brown paper.
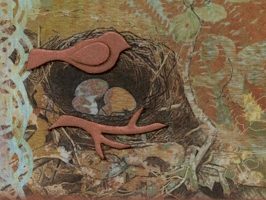
There are 3 more small dazzles and one
large Dazzle that has been inked in Copper using a masking method. That Dazzle was placed on a piece of blue that is
on the left page where you can see the negative image left from the inking. Gold Organdy Ribbon accents are also on the pages in three places.
________________________________________________
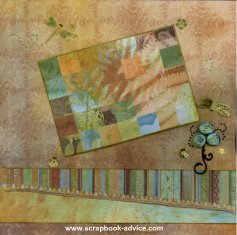
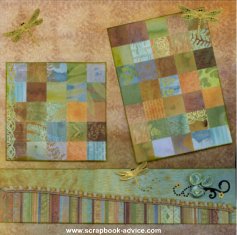
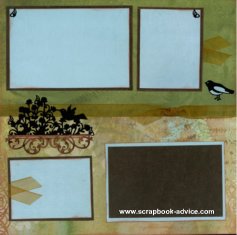
Dragonflies & Paper FlowersWhile this is the last set of Personal Shopper Scrapbook Layouts I am showing, there are still more layout ideas that I have made from the kit contents. There are a lot of items in these kits!
Here the Technique used was to cut the striped paper at an angle - different for each side and marry it up with another patterned paper. Between the two patterns is a ribbon with the same colors as the paper backgrounds. The photos mattes are another pattern in this collection with squares.
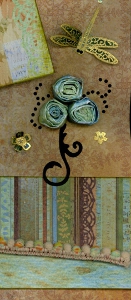
The Personal Shopper instructions on the DVD and in the Newsletter instructed me in how to make the paper flowers which I really like. They are accented with black Dazzle flourishes and the rest of the pages are accented with Gold Dragonfly Dazzles, Flowers and Dots.
________________________________________________
Check out other Personal Shopper Scrapbook Layouts
from 2010 and earlier.
Click here to see a full list of what came in one Personal Shopper Kit
Check out reviews on more Scrapbook Kit Companies
Home Page from Personal Shopper Scrapbook Layouts


